

Installation of Fabasoft Folio Backend Services and a Fabasoft Folio Domain
Commands mentioned in this document are usually executed as user root in a shell. If a command is executed as a different user, it is mentioned additionally.
Installation and Configuration of Oracle Instant Client
To install Oracle Instant Client, perform the following steps:
- Change to the directory that contains the downloaded ZIP package of Oracle Instant Client.
- Extract the compressed package:
# unzip instantclient-<version>.zip - Create a library directory for the Oracle Instant Client libraries.
# mkdir –p /usr/lib64/oracle/<version>/client/lib - Copy the files of the Oracle Instant Client to the folder.
# cp instantclient_<version>/* /usr/lib64/oracle/<version>/client/lib/ - Add the path to the Oracle libraries (default /usr/lib64/oracle/<version>/client/lib) to the global dynamic linker configuration file /etc/ld.so.conf. Therefore execute the following commands:
# cd /usr/lib64/oracle/<version>/client/lib
# pwd >> /etc/ld.so.conf - Refresh the linker cache.
# ldconfig - Create the directories /usr/lib/oracle/<version>/network and /usr/lib64/oracle/<version>/network/admin.
# mkdir -p /usr/lib64/oracle/<version>/network/admin - Copy the tnsnames.ora file form the database server (default ORACLE_HOME/network/admin) to the previously created directory (/usr/lib64/oracle/<version>/network/admin).
- Verify that the user fscsrv has the permission to read tnsnames.ora.
# cd /usr/lib64/oracle/<version>/network/admin
# ls –l
The directory listing must have at least the following entry:
-rw-r—-r-- 1 root root 364 Aug 30 01:00 tnsnames.ora - View the tnsnames.ora file using cat.
# cat tnsnames.ora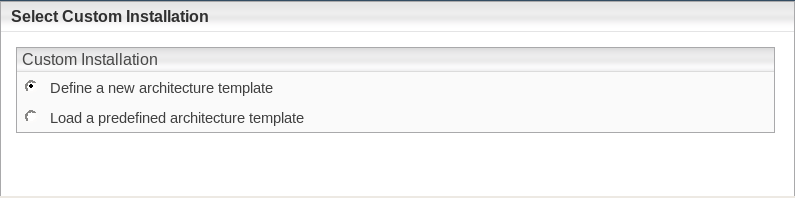
The net service name (in this case “orcl”) is required later for installing the Fabasoft Folio Domain.
Oracle Instant Client is now installed and configured.
Note: If Oracle is used as database system for Fabasoft Folio Backend Services then either the environment variable TNS_ADMIN or ORACLE_HOME have to be set before running the Fabasoft setup.
# export TNS_ADMIN=/usr/lib64/oracle/<version>/network/admin
# export ORACLE_HOME=/usr/lib64/oracle/<version>
Configuration of PostgreSQL
In order to use the phonetic search (sounds like, does not sound like) in Fabasoft Folio, the postgresql-contrib RPM (or an equivalent if compiled from source) must be installed. Additionally, fuzzystrmatch.sql, part of postgresql-contrib, must be executed when the database is created manually.
For performance reasons it is required to set the parameter cursor_tuple_fraction to the value 1.0.
The PostgreSQL Client Authentication method can be configured via the file pg_hba.conf. Fabasoft Folio supports the authentication modes trust, password, and md5.
To use SSL/TLS encryption for the connection, the SSLMODE parameter (supported values are disable and require) can be added to the client connect string. For example, the connect string “PORT=5432;SSLMODE=require” uses port 5432 for the connection and requires the server to use an encrypted connection.
Verification of the RPM Signatures
The Fabasoft Folio RPM packages are signed using a GPG key (https://www.gnupg.org: new window). This signature can be verified to ensure that the packages have not been compromised.
The Fabasoft RPM signing key can be obtained from the following URL:
https://download.fabasoft.com/keys: new window
Use the rpm utility to import the key:
rpm --import gpgkey.asc
The currently imported GPG keys can be queried as following:
rpm -qa gpg-pubkey
gpg-pubkey-aefcdcf2-63500ac3
To obtain some more information:
rpm -qi gpg-pubkey-aefcdcf2-63500ac3
Name : gpg-pubkey
Version : aefcdcf2
Release : 63500ac3
Architecture: (none)
Install Date: Mon Nov 13 11:16:01 2023
Group : Public Keys
Size : 0
License : pubkey
Signature : (none)
Source RPM : (none)
Build Date : Wed Oct 19 16:33:39 2022
Build Host : localhost
Packager : Fabasoft R&D GmbH security@fabasoft.com: new window
Summary : Fabasoft R&D GmbH <security@fabasoft.com> public key
...
If you want to remove a key the following command can be used:
rpm -e gpg-pubkey-aefcdcf2-63500ac3
The RPM signatures can be verified using the following commands:
find Setup -name '*.rpm' | xargs rpm –K
find Setup -name '*.rpm' | xargs rpm -Kv
Example |
|---|
If the corresponding public key is not installed, the output looks like this: find Setup -name '*.rpm' | xargs rpm -K Setup/ComponentsBase/Services/LINUX_RHEL_X64/fsc-base-${VERSION}-${BUILD}.x86_64.rpm : digests SIGNATURES NOT OK find Setup -name '*.rpm' | xargs rpm -Kv Setup/ComponentsBase/Services/LINUX_RHEL_X64/fsc-base-${VERSION}-${BUILD}.x86_64.rpm: If the corresponding public key is installed, the output looks like this: find Setup -name '*.rpm' | xargs rpm -K Setup/ComponentsBase/Services/LINUX_RHEL_X64/fsc-base-${VERSION}-${BUILD}.x86_64.rpm : digests signatures OK find Setup -name '*.rpm' | xargs rpm -Kv Setup/ComponentsBase/Services/LINUX_RHEL_X64/fsc-base-${VERSION}-${BUILD}.x86_64.rpm: |
Installation of Fabasoft Folio Backend Services and a Fabasoft Folio Domain
To install Fabasoft Folio Backend Services via the automated setup, perform the following steps:
- Insert the Fabasoft product DVD in the DVD drive of your server. Verify that the Fabasoft product DVD is not mounted with the noexec option. Otherwise you will not be able to run the setup.sh script.
- Open a root-console and navigate to the mount point of the DVD drive.
# cd /media/dvd - Execute the setup shell script.
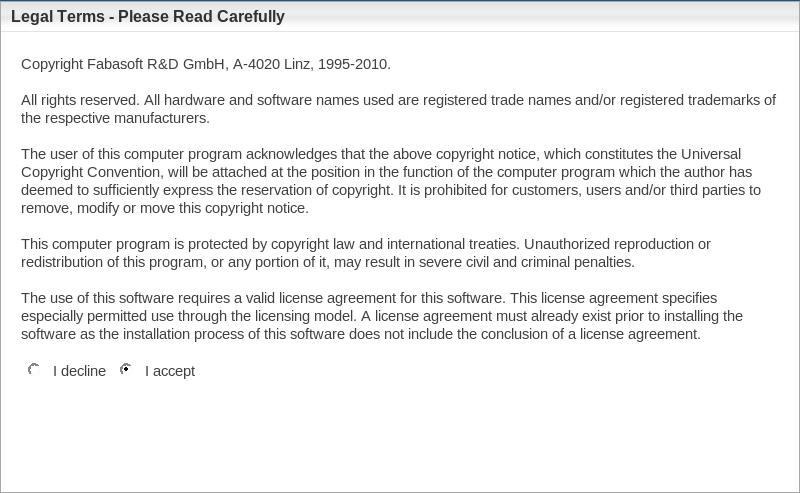
# ./setup.sh - The setup wizard will be opened in a browser window. Read the license agreement carefully. Afterwards select I accept and click “Next”.
- The configuration of the installed Fabasoft Folio system is based on a template. The template defines how many Fabasoft Folio COO Services and Fabasoft Folio MMC Services are installed. Additionally default values for the Fabasoft Folio Service are provided. The settings may be changed later on in the setup process if necessary.
- Typical
Select this option to install one Fabasoft Folio COO Service (with four Fabasoft Folio COO Stores) and one Fabasoft Folio MMC Service (with one Fabasoft Folio MMC Store). - Minimum
Select this option to install one Fabasoft Folio COO Service (with one Fabasoft Folio COO Store) and one Fabasoft Folio MMC Service (with one Fabasoft Folio MMC Store). - Custom
Select this option to install by default one Fabasoft Folio COO Service (with four Fabasoft Folio COO Stores) and one Fabasoft Folio MMC Service (with two Fabasoft Folio MMC Stores).
Select Custom and click “Next”.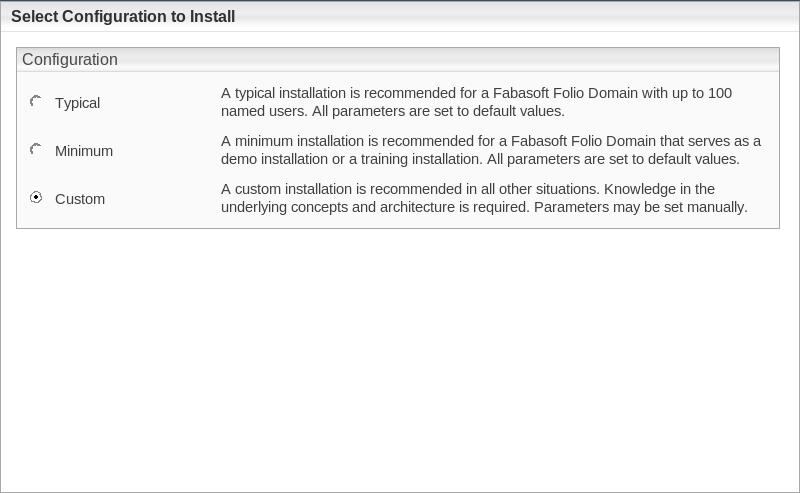
- Typical
- The option Define a new architecture template can be selected to create a new template based on default values. Load a predefined architecture template can be used to select a saved template file of a previous installation. This step is omitted if a typical or minimum installation is made.
Select Define a new architecture template and click “Next”.
- In the next dialog two options are available. Select Choose a license file for the installation of a new Fabasoft Folio Domain, specify a license file and click “Next”.
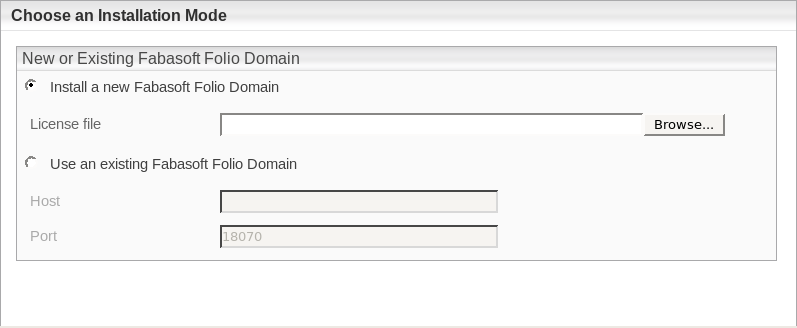
- Install a new Fabasoft Folio Domain
Select this option to install Fabasoft Folio Backend Services. In the License file field, type the path to the license file or click “Browse” to browse the file system. - Use an existing Fabasoft Folio backend installation
Select this option to use an existing Fabasoft Folio backend installation.
- Install a new Fabasoft Folio Domain
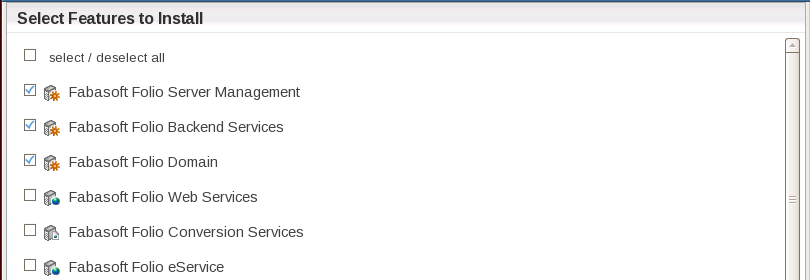
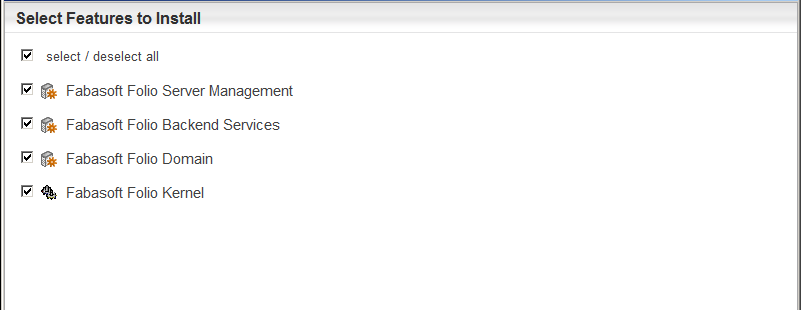
- Clear all check boxes except of Fabasoft Folio Server Management, Fabasoft Folio Domain and Fabasoft Folio Backend Services and click “Next”.
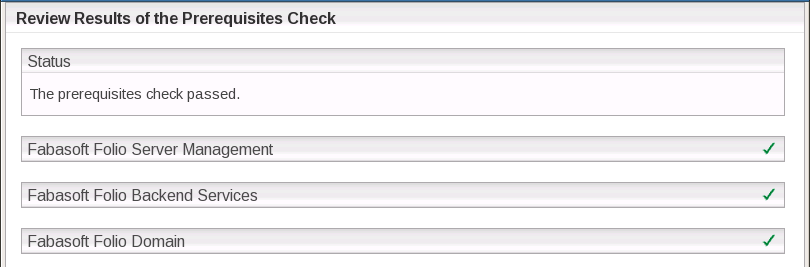
- A check on all prerequisites is performed. Its result is presented in an overview. Ensure that your system complies with all requirements (indicated by a green tick) and click “Next”.
- In the next dialog two options are available:
- Use kerberized Fabasoft Folio Service
Select this option to use Kerberos for authentication between the services. - Use non kerberized Fabasoft Folio Service
Selecting this option, Kerberos is not used for authentication between the services.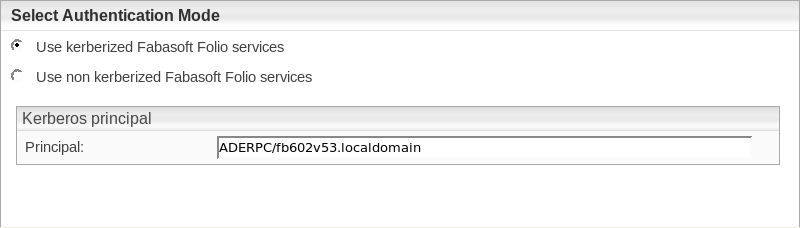
Select whether Kerberos should be used for authentication and click “Next”.
- Use kerberized Fabasoft Folio Service
- Specify the settings for the created Fabasoft Folio Domain.
- Under Edition, in the Edition/Solution dropdown list select a pre-configuration for the Fabasoft Folio Domain.
- Under Domain Details a Name for the Fabasoft Folio Domain can be specified and an ID can be selected.
Note: The available domain IDs depend on the license file used. - In the Load demo data field specify whether demo data is loaded or not.
- In the Add-ons section specify an additional Fabasoft Product if needed.
Specify your Fabasoft Folio Domain settings and click “Next”.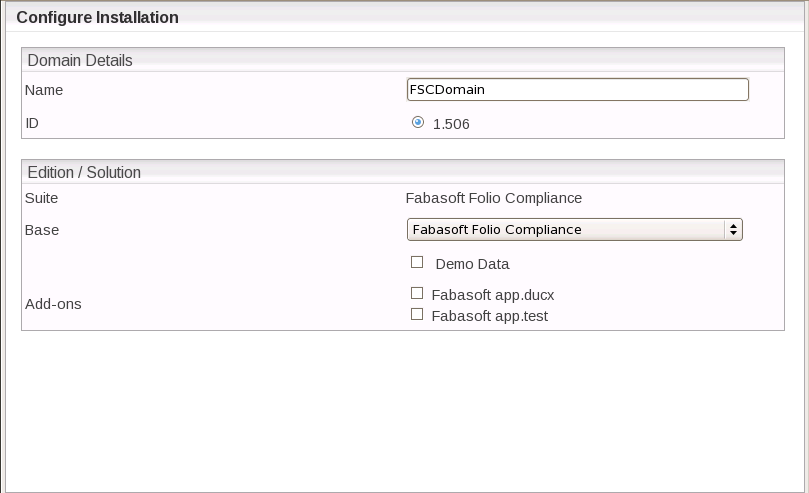
- Select the database system that should be used. Depending on the database system enter the database administration credentials and click “Next”.
- Oracle Database
In the SQL*Net Alias dropdown list select the identifier of the oracle database. The identifier will be read form the tnsnames.ora file. Type the name and the password of the oracle user “sys”.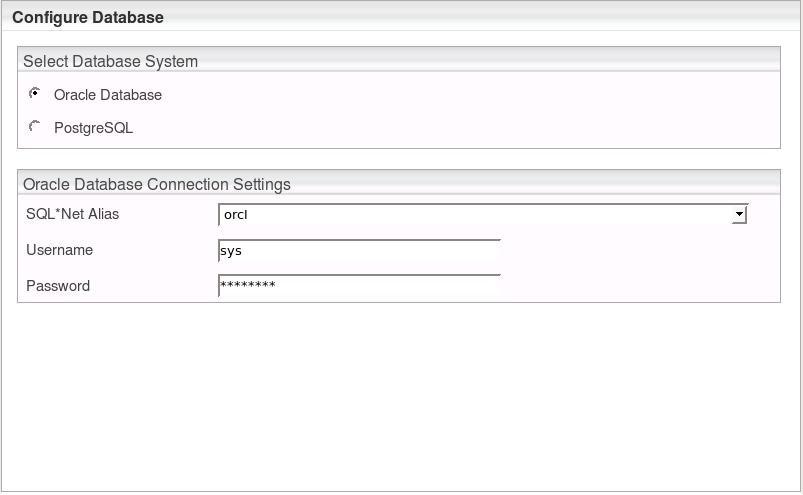
- PostgreSQL
In the Create Database box, select whether a new database should be created or an existing should be used. In the PostgreSQL Connection Settings box, type the PostgreSQL administrator credentials, the server name and the port (default: 5432).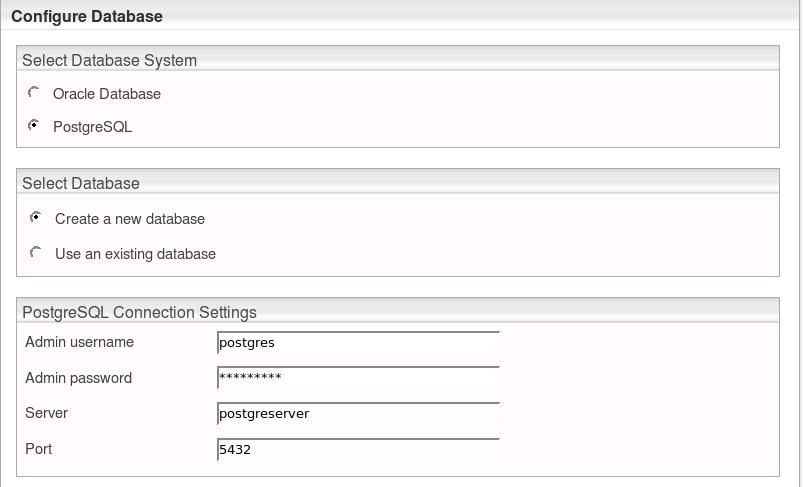
- Oracle Database
- In the Review Configuration, the Fabasoft Folio Service can be configured.
If you want to create additional Fabasoft Folio MMC Services and COO Services, click “Edit” next to Fabasoft Folio Backend Services. Otherwise click “Next” to start the installation. In this case the next steps can be omitted.
- In the Fabasoft Folio COO Services box and the Fabasoft Folio MMC Services box, the following options are available:
- A Fabasoft Folio Backend Service can be edited by clicking the name of the service.
- A Fabasoft Folio Backend Service can be deleted by clicking “Remove” ( ).
).
- A Fabasoft Folio Backend Service can be created by clicking the plus icon ( ).
).
Click the name of a Fabasoft Folio Backend Service, to edit the settings.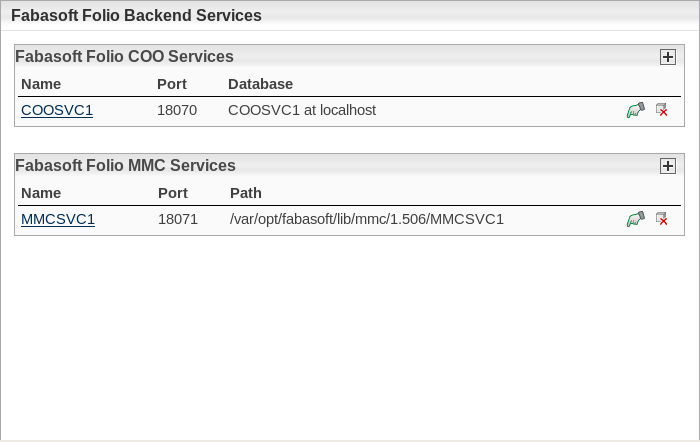
The following options are available:- Under Fabasoft Folio COO Service, Service name and Port of a Fabasoft Folio COO Service can be edited.
Using Oracle Database, the following options are available:
- Username: In the field type the name of the database user.
- Password: In this field type the password of the database user.
- Index tablespace: In this field type the name of your previously created tablespace, as described in the document “Oracle Database Preparation Guide”. If you leave this field blank the Default tablespace is used.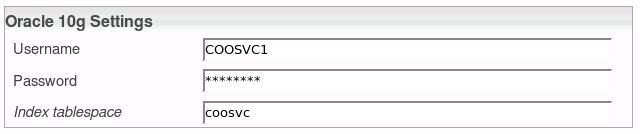
Using PostgreSQL, the following options are available:
- Server: In this field type the name of the server running the PostgreSQL database.
- Port: In the field type the port the PostgreSQL database listens on.
- Admin username: In this field type the username of the database administrator.
- Admin password: In this field type the password of the database administrator.
- Database: In this field type the name of the database.
- Username: In this field type a username which is used from the Fabasoft Folio COO Service to connect to the database.
- Password: In this field type a password for the user.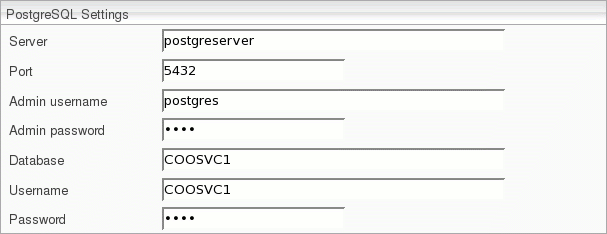
- Under Fabasoft Folio COO Stores, the currently available Fabasoft Folio COO Stores are displayed.
A Fabasoft Folio Store can be deleted by clicking “Remove” ().
To add a Fabasoft Folio COO Store click the plus icon () top right. Specify the name and select the corresponding Fabasoft Folio MMC Store. To create a Fabasoft Folio Gateway, select Gateway.
Edit the Fabasoft Folio Backend Service and click “Apply”.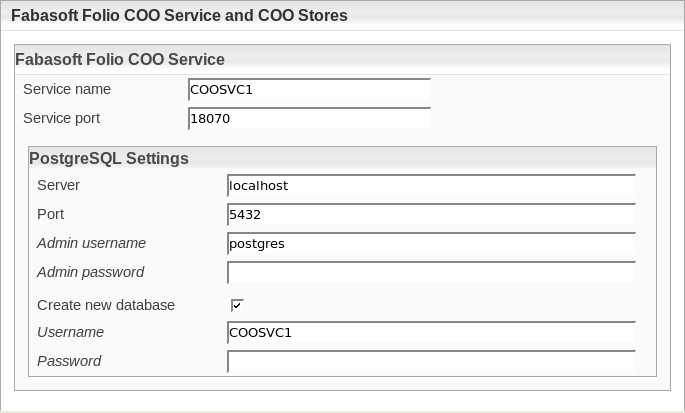
- Under Fabasoft Folio COO Service, Service name and Port of a Fabasoft Folio COO Service can be edited.
- To close the dialog for configuring the Fabasoft Folio Backend Services, click “Apply”.
- Click the title bar to display the Fabasoft Folio Backend Services configuration details.
- Verify the configuration settings and click “Next”.
Example: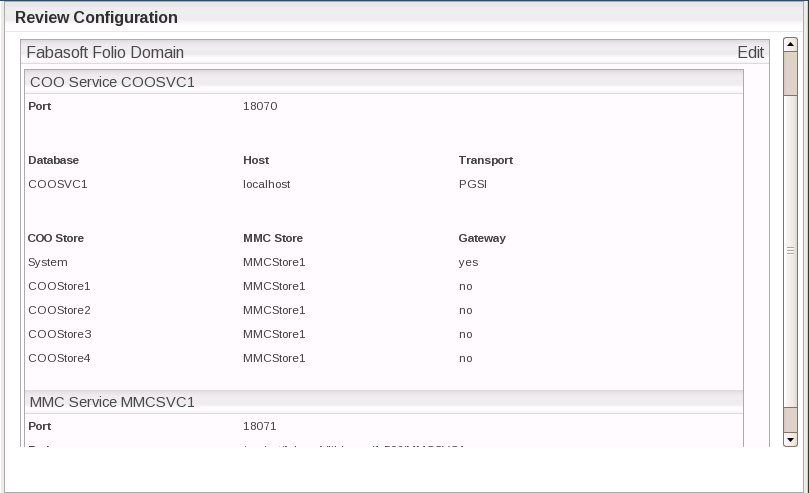
- If Custom has been selected in step 5, click “Save template” to save the configuration to a file.
- Click “Install” to start the installation.
The Fabasoft Folio Backend Services are installed.
